

Rebuilding After a Hurricane: A Homeowner's Roadmap (Repair, Repaint, Restore)
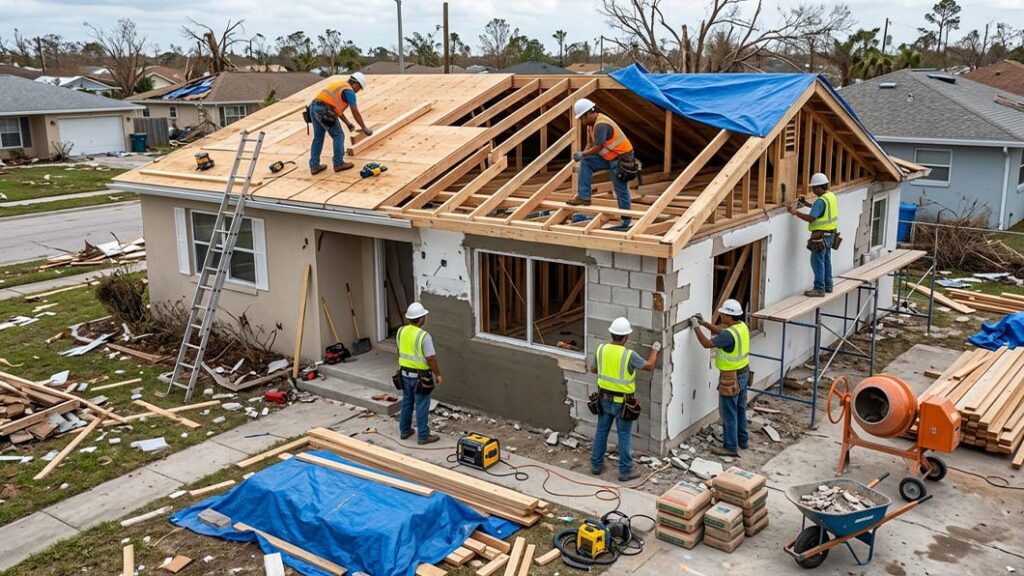
The first days after a hurricane are about survival: staying safe, finding the essentials, and getting through the cleanup. Then comes a different kind of challenge. The adrenaline fades, the adjuster has come and gone, and you are left looking at a home that needs to be put back together. Where do you begin?
If you are rebuilding after a hurricane, you are not starting from nothing. You are starting from a plan, and this guide is meant to give you one. We will walk through the full journey in a logical order, from stabilizing your home to the final coat of paint, so you always know what comes next.
This roadmap was written for homeowners in Fort Walton Beach, Destin, Miramar Beach, Panama City Beach, and across the Florida Panhandle. Every home and every insurance policy is different, so use it as a framework and adapt it with the help of licensed professionals.
This article offers general guidance. It is not legal, financial, or insurance advice. Always follow instructions from your insurer and local officials.
The Roadmap at a Glance
La mayoría de las reconstrucciones exitosas siguen la misma secuencia general. Saltarse pasos, como pintar antes de que las paredes estén secas, es lo que suele causar problemas posteriormente.
- Estabilizar y proteger la propiedad.
- Documente y presente su reclamación de seguro.
- Secar, inspeccionar y tratar el moho.
- Planifica el alcance, el presupuesto y los permisos.
- Elija al contratista adecuado
- Demuele y limpia lo que no se pueda salvar.
- Reparar la estructura y el panel de yeso.
- Restaure sus pisos
- Repintar y terminar
- Recorra el resultado final
Analicemos cada fase por separado.
Fase 1: Estabilizar y proteger su hogar
Antes que nada, asegúrese de que la vivienda sea segura y que la situación no empeore. No entre hasta que las autoridades locales indiquen que es seguro y evite cualquier área donde el agua pueda entrar en contacto con enchufes, electrodomésticos o el panel eléctrico. Si percibe olor a gas, salga inmediatamente y llame a su compañía de gas o al 911 desde el exterior.
Luego, tome medidas razonables para prevenir daños mayores: cubra con lonas las áreas dañadas del techo (si el techo no es seguro, contrate a un profesional), tape las ventanas rotas, cierre el suministro de agua si las tuberías están dañadas y retire el agua estancada cuando sea seguro. Nuestra guía sobre qué hacer durante las primeras 48 horas después de una inundación por huracán explica estos pasos en detalle.
Fase 2: Documente los daños y presente su reclamación.
Su documentación es la base de su presupuesto de recuperación. Antes de mover o desechar cualquier objeto, fotografíe y grabe en video los daños, tanto internos como externos, haga un inventario de sus pertenencias dañadas y guarde todos los recibos. Luego, presente su reclamación, obtenga un número de reclamación y mantenga un registro escrito de cada conversación.
Muchos propietarios también descubren en esta etapa que los daños causados por el viento y las inundaciones suelen estar cubiertos por pólizas diferentes, por lo que conviene revisar la cobertura cuanto antes. Para obtener información detallada, lea nuestro artículo sobre cómo documentar los daños causados por un huracán para su reclamación al seguro .
Fase 3: Secar, inspeccionar y tratar el moho.
No se debe comenzar ninguna reparación hasta que la estructura esté completamente seca. La humedad se acumula en las paredes, el aislamiento y los subsuelos, y cubrirla favorece la aparición de moho y podredumbre. Los equipos de secado profesionales y los medidores de humedad suelen ser la única forma fiable de confirmar que una vivienda está lista.
La Agencia de Protección Ambiental de EE. UU. señala que el moho puede comenzar a crecer en materiales húmedos en un plazo de 24 a 48 horas, así que no posponga este paso. Si encuentra moho, especialmente en una superficie mayor a 1 metro cuadrado o si este se encuentra en agua de inundación, llame a un profesional autorizado. En Florida, la evaluación y la remediación del moho son servicios regulados. Nuestra guía sobre el moho después de un huracán explica qué hacer y cuándo.
También es el momento adecuado para saber qué materiales se pueden salvar. Nuestro artículo sobre paneles de yeso y pisos dañados por el agua le ayudará a tomar esa decisión.
Fase 4: Planifique el alcance, el presupuesto y los permisos.
Once your home is dry and safe, you can plan the work with clear eyes. Here is how to approach it.
Define the scope. Make a room-by-room list of what must be repaired or replaced, such as drywall, insulation, flooring, baseboards, cabinets, and paint. Include exterior items like siding, stucco, and trim.
Build a realistic budget. Compare your insurance payment, your deductible, and any other funds you plan to use. Many remodelers recommend setting aside a contingency for surprises, because opening walls often reveals hidden damage. If you use financing, review the terms carefully before you commit.
Check permit requirements. Many storm repairs require permits, and your local building department can tell you what applies to your home. In some flood zones, if repair costs reach a significant portion of your home’s value, current floodplain rules may require upgrades. Ask your building department before you finalize the plan.
Decide what you want to improve. A rebuild is also a chance to make changes you have always wanted. Just keep separate what insurance may cover from what is an upgrade, so your budget stays clear.
Phase 5: Choose the Right Contractor
After a major storm, demand for contractors rises quickly, and out-of-town operators and scammers often arrive. Choosing carefully is one of the most important decisions you will make.
- Verify the license through the Florida Department of Business and Professional Regulation at MyFloridaLicense.com.
- Ask for proof of insurance, and confirm it in writing.
- Get at least two or three written estimates that itemize the work, materials, and timeline.
- Check local references and reviews. A contractor with a real local presence is easier to hold accountable.
- Be cautious with large deposits. Ask what is reasonable for your project, and never pay the full amount upfront or in cash only.
- Read the contract fully. It should describe the scope, materials, payment schedule, start and completion dates, how changes are handled, and any warranty.
- Ask about lien waivers as payments are made, so subcontractors and suppliers are paid.
- Do not sign over your insurance rights or sign anything you do not understand.
It is also wise to be patient. Good, licensed contractors are often booked after a hurricane, and a reasonable wait is better than rushing into a poor choice.
Phase 6: Demolition and Cleanup
This phase can feel emotional, because it is when damaged materials finally leave your home. It is also the moment that reveals the true extent of the damage. Wet drywall, saturated insulation, ruined flooring, and swollen trim are removed, and the framing and subfloor are cleaned and inspected.
A few reminders:
- Photograph the work before and during demolition, and share new findings with your insurer.
- If your home was built before the 1980s, have materials tested for asbestos and lead before disturbing them.
- Confirm that framing and subfloors are completely dry before anything new goes in.
Phase 7: Repair the Structure and Drywall
Once the space is clean and dry, repairs begin. Any damaged framing, subfloor, or wiring is addressed first, and licensed trades handle electrical and plumbing work as required. After that, new insulation goes in and new drywall is hung.
Good drywall finishing takes patience. Each layer of joint compound has to dry before the next is applied, then the surface is sanded smooth and primed. In Florida’s humid climate, those drying times can run longer than expected, and rushing them is a common cause of cracks, ridges, and visible seams.
Many homeowners choose moisture-resistant drywall in kitchens, bathrooms, laundry rooms, and other humid areas. It does not replace moisture control, but it can add a helpful layer of protection.
Phase 8: Restore Your Flooring
Flooring is where a house begins to feel like a home again. Before installation, the subfloor must be flat, clean, and fully dry. Installing over moisture can cause warping, mold, and failure of the new floor, and it may affect your warranty.
In a humid, storm-prone region, many homeowners favor moisture-tolerant options such as tile or luxury vinyl plank. Hardwood is beautiful, but it responds to humidity and flooding more than other options do. Consider how each material handles water, how it feels underfoot, and how long you plan to live in the home. This is especially worth thinking about if you want your space to remain comfortable and easy to maintain for years to come.
Phase 9: Repaint and Finish
Paint is the final transformation. Fresh color unifies the space and hides the memory of the damage. It also needs the most care, because paint applied at the wrong time will fail.
- Wait until everything is dry. Never paint damp drywall, and never paint over stains or mold. Moisture will cause bubbling, peeling, and discoloration.
- Use the right primer. A stain-blocking primer helps stop water marks from bleeding through, and a mold-resistant product can help in humid areas.
- Let materials cure. Joint compound, primer, and paint all need proper drying time between coats.
- Choose exterior paint made for Florida. Heat, humidity, and salt air are hard on exterior finishes, especially on stucco and wood trim.
- Plan your colors thoughtfully. Lighting changes how a color looks throughout the day, and it can look different on a wall than on a small sample.
If you are repainting any part of your home, our professional painting services cover both interior and exterior work.
Phase 10: The Final Walkthrough
Antes de realizar el pago final, tómese un tiempo para hacer una revisión minuciosa con su contratista. Lleve una libreta y un comprobante:
- Cobertura de pintura, bordes y cualquier retoque necesario
- Juntas, esquinas y textura de paneles de yeso
- Transiciones, huecos y acabados del suelo
- Puertas, ventanas, molduras y enchufes
- Limpieza del área de trabajo
Crea una lista de tareas pendientes y acuerda una fecha para completarlas. Guarda tu contrato, recibos, garantías y fotos finales en una carpeta. Te serán útiles para futuras consultas sobre seguros, mantenimiento o para vender tu casa.
Rebuilding Stronger for the Next Storm
If you are repairing anyway, it makes sense to consider improvements that help your home weather the next storm. Depending on your budget and your home, you might look at:
- Moisture-resistant drywall and mold-resistant primers and paints
- Water-tolerant flooring in lower or high-risk areas
- Raising electrical outlets and equipment higher on walls where appropriate
- Impact-resistant windows and doors, or other wind-mitigation upgrades
- Better drainage, gutters, and grading around the foundation
Some wind-mitigation features may also lower your insurance premiums. Ask your insurer or a qualified inspector what applies to your home.
See Your Rebuild Before It Begins
One of the hardest parts of rebuilding is making dozens of decisions about colors, flooring, and finishes while you are tired and stressed. It is difficult to picture a finished space from a small paint chip or a tile sample.
That is why Pros Rem uses AI-powered visual previews. Starting from photos of your own rooms, we can show you how different paint colors, flooring styles, and finishes will look in your actual space, before any work begins. You can compare options, ask for changes, and approve the look with confidence. For many homeowners, this takes the guesswork and the second-guessing out of the process, and turns recovery into something they can look forward to.
Taking Care of Yourself During Recovery
Rebuilding is a long process, and it takes a toll. Decision fatigue, paperwork, and disruption to daily life can wear anyone down. A few habits help:
- Keep one binder or digital folder for all documents, estimates, and receipts.
- Take it one phase at a time. You do not need to solve everything this week.
- Accept help from family, friends, and neighbors.
- Rest and eat well. Your health matters as much as your house.
- Ask questions. Good professionals expect them and welcome them.
If stress becomes overwhelming, consider speaking with a doctor or counselor. Recovery is not only about the house.
Common Mistakes to Avoid
- Starting repairs before the home is dry. This is the leading cause of mold and failed finishes.
- Painting over damp or stained surfaces. It hides the problem for a while, then it comes back.
- Hiring the first contractor who knocks. Verify licenses and get written estimates.
- Making permanent repairs before documenting damage. You may lose evidence for your claim.
- Paying too much upfront. Keep payments tied to completed work.
- Ignoring permits. Unpermitted work can create problems with insurance and resale.
- Skipping the contingency. Hidden damage is common once walls are opened.
How Pros Rem Can Help You Rebuild
Pros Rem is a Fort Walton Beach remodeling company serving Destin, Miramar Beach, Panama City Beach, and nearby communities. Once your home has been dried and any mold has been properly handled by licensed specialists, our team can take you through the rebuilding phases: demolition and cleanup, drywall repair and replacement, flooring installation, and painting. We provide clear, itemized written estimates, and we keep one point of contact with you from start to finish.
And with our AI-powered previews, you will see your finished space before we begin.
If your home was affected by Hurricane Isaias and you are ready to start planning, contact Pros Rem for a free estimate. You can also learn more about our drywall services, flooring services, and professional painting services.
Frequently Asked Questions
How long does rebuilding after a hurricane take? It depends on the extent of the damage, drying time, insurance processes, permits, and contractor and material availability. A small repair may take days or weeks, while a major rebuild can take months. Ask each contractor for a written timeline.
What should I repair first after a hurricane? Start with safety and protection: stop further water entry, dry the structure, and address mold. Cosmetic work, such as flooring and painting, comes last.
Do I need a permit to repair storm damage? Often, yes. Requirements vary by location and by the type of work. Contact your local building department before work begins.
Can I paint right after drywall repair? Not immediately. Joint compound and primer need time to dry and cure. Painting too soon can cause cracking, bubbling, and uneven color.
How do I avoid hurricane contractor scams? Verify the license at MyFloridaLicense.com, ask for proof of insurance, get written estimates, avoid large upfront payments, and be wary of pressure to sign immediately.
Will insurance pay for all of my repairs? Not always. Coverage depends on your policy, your deductible, and the cause of the damage. Review your policy and ask your insurer for guidance.
Final Thoughts
Rebuilding after a hurricane is a journey, and it is easier when you can see the road ahead. Protect the home, document the damage, dry everything thoroughly, plan carefully, choose licensed local professionals, and finish with care. Take each phase in order, and do not be afraid to ask questions along the way.
When you are ready to turn your plan into a finished home, our team at Pros Rem is here to help you repair, repaint, and restore.
