

How to Paint Stucco Walls the Right Way
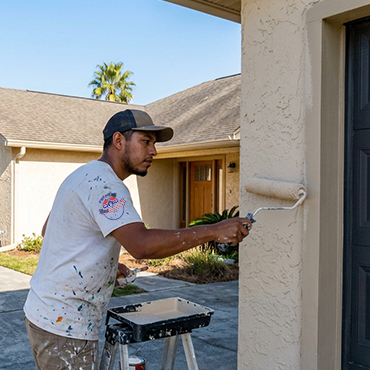
Stucco is one of the most common exterior finishes in Florida, and it is easy to see why. It is durable, it handles heat well, and it gives homes a classic Gulf Coast look. But when the paint on stucco starts to fade, crack, or peel, many homeowners are unsure how to fix it. Stucco is not like smooth siding, and the techniques that work on a wood wall often fail on a textured, porous surface.
Knowing how to paint stucco correctly is the difference between a finish that lasts for years and one that bubbles and peels after the first rainy season. The good news is that the process is straightforward when you follow the right order and respect the material.
This step-by-step guide covers inspection, cleaning, repairs, primer, paint choices, and application, with tips for Florida’s humidity and salt air. It was written for homeowners in Fort Walton Beach, Destin, Miramar Beach, Panama City Beach, and across the Florida Panhandle.
This article offers general guidance. Always follow the paint manufacturer’s instructions, and ask a qualified professional to evaluate any serious cracking or moisture problem.
Why Stucco Needs Special Care
Stucco is a cement-based material, usually a mix of cement, sand, and lime, applied over a lath or masonry base. That makeup creates a few characteristics that affect how you paint it:
- It is porous. Stucco absorbs water and paint, so it needs the right primer and often more paint than you would expect.
- It is textured. Rough surfaces hold more dirt and mildew, and they take more material to cover.
- It is alkaline. Fresh stucco has a high pH that can damage ordinary paint if it is not sealed properly.
- It cracks. Even well-built stucco develops hairline cracks as it expands, contracts, and settles. Water can enter through them.
- It needs to breathe. Moisture inside a wall has to be able to escape. Trapping it behind the wrong coating causes bubbling and peeling.
In coastal Florida, stucco also deals with heavy humidity, intense sun, wind-driven rain, and salt. That is why preparation matters more here than almost anywhere else.
You can see this kind of work in our stucco and wood soffit painting project.
What You Will Need
Gather your tools and materials before you begin:
- Pressure washer (with a wide fan tip) or a garden hose and stiff brush
- Mildew-removing cleaner
- Wire brush, scraper, and sanding tools
- Stucco patch compound and paintable exterior caulk or sealant
- Masonry or stucco primer (and block filler, if the surface is very rough)
- High-quality exterior acrylic or elastomeric paint
- Rollers with a thick nap, brushes, and optionally an airless sprayer
- Painter’s tape, plastic sheeting, and drop cloths
- Ladders or scaffolding
- Safety gear: eye protection, gloves, and a dust mask or respirator
How to Paint Stucco: Step by Step
Step 1: Inspect the walls
Walk around the entire house and look closely at the surface. Note the following:
- Cracks. Hairline cracks (thinner than a credit card) are usually cosmetic and easy to repair. Wide, long, or stair-step cracks can signal a structural or moisture problem and should be evaluated by a professional before painting.
- Peeling or flaking paint. This usually means moisture, poor preparation, or the wrong coating was used before.
- Stains and discoloration. Dark streaks often indicate mildew or algae. Rust-colored streaks can come from metal.
- White, chalky deposits. This is efflorescence, caused by moisture carrying salts through the wall. The source of the moisture has to be found and fixed.
- Soft, damp, or hollow-sounding areas. These may indicate water damage behind the surface.
- Chalking. Rub your hand across the wall. If a powdery residue comes off, the old paint is breaking down and needs thorough cleaning and primer.
If you find signs of ongoing moisture, correct the source first, whether it is a leaking gutter, a faulty window seal, a sprinkler hitting the wall, or a roof problem. Paint cannot fix a wet wall.
Step 2: Make sure new stucco has cured
If your stucco is new or recently repaired, it must cure before you paint. Many manufacturers recommend waiting roughly 28 days or longer, and the stucco should be dry and its alkalinity should drop to a level the paint can tolerate. Because requirements vary, check the paint and stucco manufacturers’ recommendations. When in doubt, ask a professional.
Step 3: Clean the surface thoroughly
A clean wall is the foundation of a lasting finish.
- Use a pressure washer on a low to moderate setting, with a wide tip and some distance from the wall. Too much pressure can damage stucco and force water into cracks and gaps.
- Treat mildew and algae with a mildew-removing cleaner, following the label. Painting over mildew does not kill it.
- Rinse well to remove dirt, chalk, loose paint, and salt residue. Near the Gulf, a salt film can interfere with adhesion.
- Let the wall dry completely. In Florida’s humidity, this may take longer than a single day, so check for dampness before you move on.
Step 4: Repair cracks and damage
Once the wall is clean and dry, fix the defects.
- Hairline cracks: Fill with a flexible, paintable exterior caulk or a masonry crack filler designed for stucco.
- Larger cracks and holes: Use a stucco patch compound, and try to match the surrounding texture so the repair does not show through the paint.
- Loose or peeling paint: Scrape and wire-brush it away, and feather the edges.
- Efflorescence: Brush off the deposits and clean the area following the product directions, then make sure the moisture source has been resolved.
- Spalled or crumbling areas: Remove loose material and patch properly.
Allow patches to cure according to the product instructions before priming.
Step 5: Caulk and protect surrounding areas
Seal gaps where stucco meets windows, doors, trim, vents, and fixtures using a flexible, paintable exterior sealant. This keeps water from getting behind the paint. Then cover windows, doors, light fixtures, outlets, plants, and walkways with painter’s tape, plastic, and drop cloths.
Step 6: Apply primer
Primer is not optional on stucco, especially when you are painting bare, patched, or very porous surfaces. A masonry or stucco primer seals the surface, resists alkalinity, and helps the topcoat bond evenly.
- On rough or very porous stucco, a filler-style primer can help fill the tiny pores and reduce the amount of paint needed.
- Make sure the primer is made for exterior masonry, and check that it suits the paint you plan to use.
- Let it dry fully before applying paint.
Primer also helps block stains and gives you a more uniform color, particularly if you are changing from a dark shade to a lighter one.
Step 7: Choose the right paint
Two main types of paint work well on stucco in Florida:
High-quality 100 percent acrylic latex is flexible, resists UV and mildew when formulated for it, and allows moisture vapor to pass through. It is the most common choice for exterior stucco.
Elastomeric coatings are thick, rubber-like products that can bridge hairline cracks and add a waterproofing layer. They can be a good fit for stucco that is dry, sound, and prone to small cracks. However, they form a heavy film, so they can trap moisture if the wall is damp or has an unresolved moisture problem. Use them only on properly prepared, dry walls, and ask a professional if you are unsure.
Whichever you choose, buy a quality product line made for exterior masonry. Our guide to the best exterior paint for Florida’s humidity and salt air explains what to look for in more detail.
Step 8: Apply the paint
Stucco’s texture takes some technique.
- Use the right tools. A roller with a thick nap, about three-quarters of an inch or more, pushes paint into the texture. Brushes help with edges and corners.
- Consider spraying and back-rolling. Many professionals use an airless sprayer to apply paint quickly, then roll it immediately to work it into the surface. This gives better coverage and adhesion than spraying alone.
- Work in sections. Paint from top to bottom, and keep a wet edge to avoid lap marks.
- Use enough paint. Stucco absorbs more than smooth siding, and the coverage per gallon is often lower. Follow the manufacturer’s coverage guidelines, especially with elastomeric products, which are applied thickly.
- Fill every pocket. Check the low spots in the texture and the corners to make sure no bare areas are left.
Step 9: Apply the second coat
Most stucco jobs need two coats. Let the first coat dry for the time recommended on the label, then apply the second in the same careful way. Two coats provide better coverage, color, and long-term protection, which matters in strong Florida sun.
Step 10: Clean up and inspect
Remove the tape while the paint is still slightly tacky, when possible, to avoid peeling the edges. Walk the house in good light and look for missed spots, drips, and thin areas. Touch up while your tools and paint are still handy.
When to Paint Stucco in Florida
Weather has a major effect on results. In general:
- Check the label for the acceptable temperature and humidity range.
- Avoid painting when rain is expected within the cure time on the label.
- Wait for morning dew to dry before you start.
- Avoid painting in direct, intense sun on a hot wall, since paint can dry too fast and bond poorly.
- Plan around hurricane season, which runs from June through November, and keep your schedule flexible.
Many Gulf Coast homeowners find that spring and fall offer more comfortable conditions, but a good painter can work through the year by managing the conditions.
Choosing Colors for Stucco
Stucco’s texture creates tiny shadows, which can make a color look slightly deeper than it does on a flat sample. Always test your color on a section of the actual wall and view it at different times of day.
Lighter colors reflect more heat and tend to fade less visibly in Florida’s sun. Darker shades can look striking but absorb more heat and may fade faster, so they call for premium UV-resistant paint. If your community has a homeowners association, check the color rules before you buy.
Pros Rem uses AI-powered visual previews to help with this decision. Starting from a photo of your own home, we can show you how different colors will look on your walls, trim, and doors before any paint is applied. You can compare options and approve the look with confidence.
Common Mistakes to Avoid
- Skipping the primer. Without it, paint absorbs unevenly and adhesion suffers.
- Painting over mildew. The growth continues under the paint and returns quickly.
- Painting a damp wall. Moisture trapped under paint causes bubbling and peeling.
- Ignoring cracks. Water gets in through them and undermines the finish.
- Using the wrong product. Interior paint, thin paint, or a coating not made for masonry will not last.
- Using too much pressure when washing. It can damage stucco and push water into the wall.
- Applying one thin coat. It leaves the wall under-protected.
- Painting in poor weather. Rain, dew, and extreme heat can ruin a fresh coat.
- Covering a moisture problem. Fix leaks and drainage first.
After a Hurricane: Painting Stucco Safely
Storms can drive water into stucco and open new cracks. Before you paint after a hurricane, inspect the walls for cracks, loose areas, and signs of water intrusion, and make sure everything is completely dry. If you notice stains, soft spots, or mold, address those first. Painting over a wet or damaged wall will cause the new paint to fail. Our guide to rebuilding after a hurricane explains the right order of repairs.
Maintaining Painted Stucco
A little maintenance goes a long way.
- Rinse the walls gently once or twice a year to remove dirt, pollen, and salt.
- Clean mildew when it first appears.
- Inspect for new cracks, especially after storms, and repair them promptly.
- Keep sprinklers pointed away from the walls.
- Trim vegetation so air can circulate.
- Check caulk around windows and doors each year.
A well-prepared, quality paint job on stucco often lasts around five to ten years in humid coastal climates, though homes with heavy sun or salt exposure may need attention sooner.
DIY or Hire a Professional?
Small projects, such as a garden wall or a low section, are manageable for a determined homeowner. But painting a full stucco house is a big job. It often involves ladders or scaffolding, large amounts of paint, spraying equipment, and careful preparation. Mistakes can be expensive, since a failed coating has to be removed before the wall can be repainted.
Consider hiring a professional when:
- The house is two stories or has hard-to-reach areas
- You see wide cracks, widespread peeling, or recurring moisture
- You want to use elastomeric coatings or other specialty products
- You are short on time or equipment
- You want a written warranty on the work
When you collect estimates, ask for the prep steps, the exact product line, the number of coats, and the timeline in writing. Request proof of liability insurance and workers’ compensation coverage or a valid exemption, since requirements vary by location. For help understanding pricing, see our interior painting cost guide, which also explains how to compare quotes.
How Pros Rem Can Help
Pros Rem is a Fort Walton Beach remodeling company serving Destin, Miramar Beach, Panama City Beach, and surrounding communities. Our team handles interior and exterior painting, along with the repair work that often goes with it, including drywall, trim, and carpentry. We provide clear written estimates that explain the preparation, the products, and the scope of the job.
If your stucco needs a fresh start, contact Pros Rem for a free estimate. You can also learn more about our professional painting services.
Frequently Asked Questions
Do I need to prime stucco before painting? In most cases, yes. Primer seals the porous surface, helps resist alkalinity, and improves adhesion and color. It is especially important on bare, patched, or very porous stucco.
What is the best paint for stucco in Florida? High-quality 100 percent acrylic latex is a common choice. Elastomeric coatings can also work on dry, sound stucco with hairline cracks, but they should be used only after a proper evaluation.
Can I paint stucco without pressure washing? You can clean it with a hose, a stiff brush, and the right cleaner, which is gentler. The key is to remove dirt, chalk, mildew, and salt. Avoid very high pressure that could damage the surface.
How long should I wait to paint new stucco? Many manufacturers recommend about 28 days or more, plus confirmation that the wall is dry and ready. Always check the product instructions.
Should I roll or spray stucco? Both have a place. Many professionals spray and then back-roll to push paint into the texture. Rolling alone works, but it takes longer on a large home.
Why is my painted stucco bubbling or peeling? The most common causes are moisture in the wall, painting over dirt or mildew, skipping primer, or using the wrong product. Find and fix the moisture source before repainting.
Final Thoughts
Painting stucco is less about the paint and more about the process. Inspect carefully, clean thoroughly, repair cracks, prime the surface, choose a high-quality product, and apply it with the right tools in good weather. In Florida’s humid, salty climate, those steps are what make a finish last.
When you are ready to refresh your home’s exterior, our team at Pros Rem is here to help you every step of the way.
